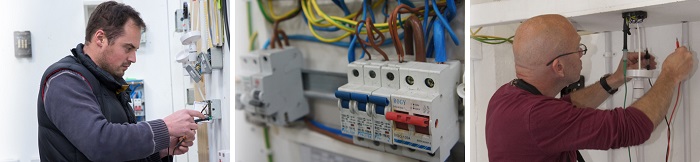
It’s happened to us all at some time or other, the job we have been putting off because it’s a little bit too big or we’re not sure how to do it. We bite the bullet and decide to get a tradesman in to do the work for us. Which tradesman? Where do we go to find out if the voice at the end of the phone is in fact a ‘quality’ tradesman and not John Wayne with a screwdriver?

You could go to www.trustmark.org.uk

TrustMark is a government endorsed scheme that regularly checks that the registered tradesmen are providing their customers with the quality service and workmanship members of the public expect and deserve (quite rightly). Trustmark registered firms have to;

  1. A firm's technical skills have been independently checked through regular on-site inspections, as well as checks on their trading record and financial status;
  2. Firms have signed up to a code of practice that includes insurance, good health and safety practices and customer care;
  3. The approved scheme operator has checked and will continue to monitor the firm's quality of work, trading practices and customer satisfaction;
  4. Firms are able to offer an Insurance Backed Warranty;
  5. Deposit Protection Insurance is available for consumers in the event a firm should cease trading;
  6. Firms will be able to tell you about any building regulations you must comply with and may also be able to provide appropriate certificates;
  7. If you have a problem or disagreement with the firm, there will be a clear and user-friendly complaints procedure to help resolve the issue;
  8. The scheme is fully supported by Government, the building industry and consumer protection groups.
  9. All of these checks will give you - Peace of Mind.

When employing a tradesman TrustMark recommends you take the following advice;

  • Be specific and set out a detailed, clear brief when requesting at least three quotes.
  • Ask friends and family for a recommendation and check the TrustMark website to ensure that the tradesman is registered for the particular trades you require
  • Use a firm that advertises using a landline phone number and be very wary of those only willing to give you a mobile number
  • Seek references, speak to previous customers and if a reasonable sized job, visit previous jobs
  • Don't just go with the cheapest, consider your ability to communicate with the firm and the quality of their work
  • Only pay for work that has been done and not by advance payments
  • If materials need to be bought in advance by the tradesman, it is reasonable that the customer is asked to pay a fair percentage of these costs as the job progresses
  • Always use a written contract as it offers you protection if anything does go wrong
  • Agree in writing any changes to the agreed contract value and ensure these are agreed in writing before the work is done.

If you use a TrustMark tradesman your work should be carried out to a high quality and if things go wrong (God forbid) you, through the scheme, have a means of recourse. That has to give you Peace of mind.

- Mark Jenkins


Mark Jenkins is the Electrical Course Development Manager at Access Training. If you would like to learn more about electrical work and maintenance, you might want to consider one of the many electrical training courses we offer. These are available for both DIY enthusiasts AND people looking to gain the vital qualifications needed to make the career change to become an electrician. To find out more give us a call on 0800 345 7492.

Flush only once. If it's not flushing the first time, don't flush again. This will cause more water to be pumped into the toilet bowl. If the toilet becomes clogged the first flush will not cause the bowl to overflow, but the second flush might!

Put on a pair of rubber gloves. Toilets are inherently unsanitary places to work, but a good pair of rubber cleaning gloves will protect you from any germs within. If you can see the cause of the clog, remove it from the toilet if possible.

Protect the floor. What's worse than a clogged toilet? An overflowing toilet. Minimize the potential damage by placing newspapers or paper towels on the floor to soak up liquid. Besides, minor splashes and spills are bound to occur when you're unclogging the toilet. The paper will make for easier clean-up later.

Make sure the water supply to the toilet is off. It should be located right behind the toilet, and looks like a regular faucet knob. Do not shut off the supply for the house, since this will prevent others from using water. If the water is off to at least the toilet, this will prevent the bathroom from flooding.

Ensure that the bathroom has good air circulation. Turn on the ventilation or open a window to minimize foul odours, and to protect against potentially toxic fumes from any chemical products you may need to use.

Plunger Method

If you know there's an object (such as a child's toy) causing the clog, skip the plunging and go straight to another method.

Be sure to use the right plunger. It is important to use a large heavy-duty rubber plunger, either the ball-shaped type or one with a fold-out rubber flange on the bottom which forms a seal. Do not use the small cheap suction-cup type of plunger––these will often not work. Remember, the larger the plunger, the more force you can apply down into the clogged drain. The plunger should have a shape which ensures that the water you force out of it when you push down does not shoot back up into the toilet bowl instead of pushing into the drain.

If your plunger is not making a tight seal, try wrapping an old rag around the end of the plunger and press down on any leaks. Run the plunger under hot water before using it. This will soften it up, which will help with creating a seal.

Insert the plunger into the bowl and press down firmly but slowly. Make sure you're covering the hole completely. The plunger should be submerged in water to be effective. It is important to be pushing and pulling with water, not air.

Add water to the bowl if necessary. Sharply pull up on the plunger to create suction in the drain, then push in to create pressure. Remember, the clog got jammed going in, so don't be too aggressive with your pushing because you might just jam it further. It is more the suction than the pressure, constantly disturbing the clog in both directions that will gradually cause it to be loosened.

If the plunging eventually drains the bowl but the clog is still blocking a free flow down the drain, leave the plunger in the bowl and fill the bowl with water again. Fill it to the point it is normally after a regular flush. Then plunge again. Stubborn clogs might require you to do this a number of times.

Should plunging fail to unclog the drain, a wire coat hanger may clear the obstruction. This will generally work if there is an obstruction in the first few inches of the drain.

Unravel the hanger, twisting the top ends apart until they are no longer connected. (To avoid damaging the porcelain tightly wrap one end with a rag). Stick the wrapped end of the wire into the drain. Once the wire is in the drain, twist it, push it, and manoeuvre it in a circular motion to clear the drain

Plumbing Snake Method

Purchase or borrow a plumbing snake. A plumbing snake (also sometimes called a "flexible cleaning tool" or "auger") is a flexible coil of wire that can "snake" through the curves of a drain and get deeper than a wire can. The best snake is a "closet auger" which is designed specifically to clear toilet clogs without damaging or staining the bowl. A plumber would likely use a closet auger.

Insert one end of the snake into the drain. Push down, feeding the snake further into the drain until you feel an obstruction. Twist and push the snake through the obstruction until the water begins to drain

Snake in reverse, as it may become necessary to remove the toilet and run the snake through in the opposite direction. This is especially true with hard obstructions that may have been flushed by a curious child. If a hard obstruction is known, and you are not comfortable removing and replacing the toilet, contact a plumber.

- Mark Lewis


Mark Lewis is the Plumbing Course Development manager at Access Training. If this blog has interested you and you would now like to learn more about the plumbing trade, you might want to consider one of our extensive plumbing training courses. These range from DIY courses for enthusiasts to professional courses that will give you the qualifications you need to become a plumber. If you would like to find out more give Access Training a call on 0800 345 7492 and we'd be happy to explain in greater detail.

The BPEC Charity is once again taking nominations for its Life Award programme, which offers a grant of up to £15,000 to those with plans of improving others' lives using their plumbing skills.

Last year £30,000 was given to four projects which ranged from developing a safe water system to a health clinic in Mozambique, apprentice plumbers working alongside a village community in Uganda to build drinking water wells and similar safe drinking water work in Nicaragua. A little closer to home, the charity also gave money toward the development of a virtual plumbing college online to support students and teachers alike. Regular updates on these projects can be found on the Life Award's progress blog

There are three separate opportunities for financial support over each year which are open to ALL who are working in the UK plumbing industry, whether you are self-employed, a tutor or even an apprentice. These are the BPEC Life Award, the BPEC Support Fund and the BPEC Sport Awards.

The BPEC Charity, also known as BPEC (Training) Ltd, was re launched in 2012 with the strapline of "re-investing in our industry". The charity's focus is to raise the knowledge and skills of those working in the UK Plumbing and Heating industry. It also provides the opportunity to offer support to those who would like to pursue a career in the industry, particularly those from disadvantaged backgrounds. More about its vision, mission and values can be seen HERE.

You can register to find out more about the Life Award. The deadline for entries is the 31st July.

-----

Access Training's bespoke plumbing courses are BPEC accredited, a sure sign of the quality of learning we offer students. If you are interested in gaining the necessery qualifications to become a plumber, our experienced teaching staff are ready and waiting to help you. To find out more give us a call on 0800 345 7492.

common electrical problems

Some electrical problems are more common than others, and not everyone requires an intensive electrician course or professional qualification to deal with the issue at hand. With this in mind, here's a short list of five of the most common household electrical problems, and how they can be fixed with ease.

1. No power from an electrical socket

This common household electrical problem could be due to a number of things, some of which you will be able to fix yourself without the aid of a professional electrician. Usually, it's down to a tripped circuit breaker, or perhaps the fuse has gone.

Alternatively, it could be because of a loose wire somewhere. It's easy to check whether the circuit breaker has tripped or the fuse has blown, but if its neither of these you may need the aid of a power tester/voltage meter. If the test results in low or no power, it probably means the wiring is loose somewhere and requires further inspection.

2. Flickering lights

Again, this household electrical problem could be due to any number of reasons. Flickering lights or those that do not turn on/off when commanded are usually due to a larger problem, as is a buzzing sound you'll hear when the lights are on. The simple answer is that you might be using the wrong wattage light bulb, but it could also be a case of a bad connection. Whatever it is, in most cases this can be fixed by simply changing the bulb.

3. Half the house lights have gone off

We've probably all been here at some point. Usually, this household electrical problem can be fixed by locating your house's fuse box and flipping the switch (be sure all the light switches are off in the affected area though!). However once again it could be a short fuse or loose wiring somewhere. You might be able to locate this with your voltage tester/power meter but it's recommended that you call an electrician if needed.

4. Strange smell coming from switch/socket

When the circuit connection of an electrical device is damaged, the electricity jumps to complete the circuit. Not only creating this smell but also potentially resulting in a fire as the electricity zaps anything along the way. Electrical device arcing also indicates a serious damage to both the socket and electrical device. You'll need to unplug the appliance immediately and seek the help of a professional.

5. Hot switches

This usually occurs in dimming switches when they are running bulbs that are equal to or less than 600 Watts. When this happens, achieve the wattage required to run the dimmer properly by adding the right amount of bulbs. However, if it's the wall socket that's hot, you need to use a voltage meter to look for a high decrease or increase in voltage.

Hopefully, this post has helped you in being able to identify some of the common electrical problems you might find at home, and what you can do to fix them. However it is important to know your limitations, and NEVER attempt something that should be performed by a professional electrician.

If you would like to find out more, Access Training offer a DIY Electrical course in addition to our professional qualification courses, giving you the opportunity to practice your DIY electrical skills under the tutelage of industry professionals. For more information give us a call on 0800 345 7492.

Installing a tap will only take you around half a day, but you will need basic plumbing skills. Under current regulations you have to fit an isolation valve and a double check valve inside your home when you put in a new outdoor tap (see below for details). If you need to know more about the regulations talk to your Water Company or local council.

  1. Turn the isolation valve off if there is one on your cold water supply pipe where your new garden tap is to be connected.

  2. If there's no isolation valve, turn off your main stopcock. This is fitted on the pipework and normally found either in the kitchen or where the mains water enters your house.

  3. Finally if you can't find the stopcock, turn off the water authority's valve under the cover in the street or your front garden. You'll need a special long-handled spanner, available from plumbers' merchants. Once the water supply is off, open the cold tap on your sink until the water stops running and the system is drained.

  4. If you're installing a new tap you need to bore a hole through your outside wall for the connecting pipework. It's easiest to make the new connection near an exposed cold water supply inside your house - near the kitchen sink, for example.

  5. Position your outdoor tap at least 250mm above the damp-proof course. Then mark the screw holes where your tap will be.

  6. You will need a 15mm diameter pipe to connect the tap to the cold water supply inside the house. Position the hole for this about 150mm above where you've marked the position of the tap.

  7. Before drilling the hole, run the pipe through a piece of 22mm diameter copper pipe. This acts as a 'sleeve', which will prevent the pipe rubbing and water leaking out of the hole if the pipe bursts. When drilling, make sure the hole is wide enough to take the sleeve's diameter.

  8. Steadily drill through the wall with a heavy-duty power drill and a large masonry bit at least 325mm long. Take out the core bit regularly to clear the loosened masonry and let the bit cool down.

  9. With the supply turned off, cut through the cold water pipe directly below the exit hole you've drilled in the wall. Use a hacksaw or pipe slicer to do this and file the ends of the pipes smooth.

  10. Remove enough pipe to fit a T-piece connector. Connect one end of a short piece of pipe to the T-piece. Connect the other end to an isolation valve. This allows you to cut off the water supply to the new tap if you need to in the future. Isolation valves let you turn off the water to an individual appliance without having to turn off the whole water supply. You can get two types of isolation valve: a push-fit valve, which simply pushes on to the ends of the pipes, and a compression valve.

  11. Fit the valve the right way round or else it won't work correctly – there will be an arrow on the valve showing the direction of the flow of water.

  12. When you've turned off the water supply, mark the section of pipe that needs removing to receive the valve. Cut the section from the pipe and be sure to file the ends smooth again.

  13. Now slide a compression nut onto each piece of pipe followed by the olives. Push each end of the pipe into the fitting and tighten the compression nuts by hand.

  14. Use a pair of pliers to hold the body of the valve and tighten the compression nuts about three-quarters of a turn with an adjustable spanner. When you turn on the water supply again, check for leaks. Tighten the compression nuts a little further if you have to.

  15. Next you'll need another short piece of pipe to connect the isolation valve to a double check valve. Water regulations say you must fit one of these to your outside tap pipework. Double check valves stop water flowing back up a pipe the wrong way. This prevents contaminated water entering your drinking water supply.

  16. For a new outside tap the double check valve must be fitted in your internal pipework, after the isolation valve. Double check valves are installed in a similar way to isolation valves.

  17. After fitting the double check valve insert another short piece of pipe and an elbow. Then fit a length of pipe long enough to reach horizontally through the wall to the outside. When it's through the wall, cut the pipe to leave about 25mm protruding.

  18. Finally, you'll need to cut a piece of pipe that reaches from the pipe protruding from your outside wall down to the position of your tap. These pipes will be connected using another elbow joint.

  19. Connect all the parts together and tighten the joints with two adjustable spanners. You can tighten the joints more if they leak when the water supply is turned back on, but be sure not to over tighten.

  20. Drill the fixing holes for the tap's wall plate, insert plugs and screw the tap plate to the wall. Screw the tap tail into the elbow joint.

  21. Use plastic retaining clips for the pipes on the inside wall to stop the pipes vibrating and knocking against it. Then seal around the pipe hole in the wall with an expanding foam filler or sealant.

  22. Water resistant foam pipe lagging should cover all the pipework that is on the outside of the building to protect against freezing. This will be fitted after testing for leaks.

  23. Finally, turn the water supply back on and check for any leaks. Tighten joints if you need to and then you're ready to go!

- Mark Lewis


While we hope that this quick guide has helped you in installing your very own outside tap, there is only so much that can be explained online. If you would like to learn more plumbing skills, whether it be for future DIY projects or to attain the qualifications to become a professional plumber, we offer a number of intensive plumbing courses here at Access Training. If you would like to find out more, contact us on 0800 345 7492.

Full story: HVP Magazine - Plumbers feeling positive for 2013

Plumbers across the UK are expecting to see an improvement in business throughout this year, as discovered by a recent event organised by software/service provider Sage. An overwhelming 90% of attendees are expecting their business to grow by up to 15% by the end of 2013, with many revealing that in the past managing their finances and administration tasks have been their biggest difficulty.

The main focus of the event, which was held in Croydon, was to determine whether local businesses understood the recent changes to PAYE (Pay-As-You-Earn tax) reporting with the introduction of RTI (Real Time Information) reporting requirements. Overall knowledge of these changes seemed divided, with only about half being aware of the changes and what they meant. However a third of respondents planned to increase their staffing in the near future with an apprentice or full-time employee. Those intending to expand were uncertain about what the changes mean for them, whilst those that don’t cited extra red tape as the main reason for remaining a sole operator.

Neilson Watts from Sage UK said: "I’m not surprised that the research highlighted so many people struggle with their finances. No one starts a business or becomes a plumber because they love the admin side of things – it’s because they have a skill and a genuine passion for their trade, but if you don’t get it right it can come back to bite you."


So will 2013 be the year you strike it big as a plumber? If you're looking to change careers and move into the world of plumbing, it's important to be fully prepared. Access Training offer a fully comprehensive plumbing course, giving you all the industry standard qualifications employers look for. But as well as improving your prospects for employed work it'll also give you good grounding to set up your own self-employed plumbing business. Even when you've completed the course, Access Training will be on hand to help you as you set up the business and our tutors available to give advice whenever you may need it.

Make 2013 your year. Call 0800 345 7492 today.

Full story: Daily Mail - 'Incompetent' plumber causes gas explosion

A 32-year old plumber is currently in court after he caused a gas explosion which resulted in a home being 'blown from its foundations' and leaving the couple inside with serious burns.

While converting the former kitchen of Martyn Moody and his wife Theresa's luxury home in the Lincolnshire Wolds into a dining room, plumber Daniel Hickling cut off and capped the protruding gas pipe, burying it under the floorboards. However during the work he punctured the pipe and failed to carry out a straightforward check to ensure there had been no damage to it.

Later the couple smelt gas and began searching their home. During this time Mr Moody flicked on a cigarette lighter and the flame ignited, causing a massive explosion with such force that the entire building moved an inch. Mr Moody, a retired construction and electrical tradesman spent two weeks in hospital undergoing skin grafts after suffering serious burns to his hands, arms and scalp. His wife suffered burns to her legs and feet but was released from hospital after two days.

The home, which the couple had built for themselves in 1993, sustained so much damaged that it had to be almost completely rebuilt. It was a year before the couple were able to move back in. They were also left £100,000 out of pocket after being found to be underinsured on their contents insurance and thus had to cover some of the loss themselves.

Lincoln Crown Court were told by prosecutor James Puzey that Hickley was "incompetent to carry out this work and it was carried out incompetently. That led directly to an explosion which almost destroyed the property and caused serious injury to the householders." It was also revealed that he was not a registered Gas Safe engineer and failed to tell the couple this when he agreed to do the work. However he claims that he did not know he would be working on a gas pipe and as such never put himself forward as properly qualified.

Hickley has admitted to breaching the 1998 Gas Safety Regulations and performing work to an inappropriate standard. Recorder Helen Malcolm QC has adjourned the case to a future date when she will give her ruling on the case following these two days of evidence.

-----

Cases like this are a prime example of why having the right qualifications to do the job is vital. Simply having plumbing qualifications is not enough if you are potentially going to work with gas pipes, as not only are you breaking the law and could potentially face prosecution but you are also endangering the lives of your customers. If you train as a gas engineer, becoming Gas Safe Registered isn't just advised, it is essential proof that you are legally competent to work with gas pipes and gas appliances safely. If you are a plumber and would like to learn more about gas engineering, gaining the qualifications required to be elligable for Gas Safe registration, we at Access Training offer comprehensive gas courses to ensure you are fully trained. To find out more click the link or give us a call on 0800 345 7492.

electric shower

Firstly when you’re having problems with your electric shower don’t attempt to fix it, this is false economy – you’re much better off changing the item completely. Here are a few steps to show you how to change an electric shower. 

  • Step One - Safely take off the front cover of the electric shower box. There will be at least 1 or possibly 2 small screws holding this in place. Next, take off the front temperature and control knobs by pulling them straight off (this shouldn’t be too difficult to do). With the front cover off you should be able to see a valve on the water pipe going into the shower unit, it should have a screw slot in the middle of the valve. Turn this a ¼ turn either way and test the shower to see if this has turned off the water. You can use the control knob by temporarily re-attaching it to the shower to get the water to flow.
  • Step Two - When changing an electric shower, you must turn off the electric supply at the consumer unit (or fuse board as it’s commonly known). The fuses/trips should be marked but if they’re not, the 1 of 2 possible trips you are going to turn off will be either a 35 amp or a 45 amp depending on the Kilo-watt power of the shower. For a 35 amp fuse/trip, the shower should not be over 8.5 kilowatts. For a shower that is greater in kilowatts, the fuse/trip will be a 45 amp.
  • Step Three - The next step in changing your electric shower is to check that the electric has been turned off by either pulling the cord switch in your bathroom or the wall-mounted one outside. Run the shower and make sure that the running water isn’t warm/hot. With the electric turned off, you can put a notice hanging from the consumer unit to warn others not to turn back on.
  • Step Four - If the water is now off you can take off the water connection where it connects closest to the unit. Undo the electric cable connections and remove the unit, remembering to replace like-for-like in the kilowatt power rating of the unit (this rating can be found somewhere on the old unit, and on the front cover box of the new one).
  • Step Five - When you have connected the new unit to the electric cable and to the water supply, check the water flow through the unit first, then with the cover on the unit you can turn the electric fuse/trip back on. Go back to the unit and turn the wall-mounted switch or pull the cord on, turn up the thermostatic control on the unit and the water control knob to on. Your new shower should be working, but with the new shower unit you will have the manufacturer’s instructions in the box. Follow these carefully, and it should be safe for you to install.

- Mark Lewis

 Would you like to learn more about the kind of DIY plumbing tasks you can perform yourself around the home? Access Training offers a number of bespoke plumbing courses for both DIY enthusiasts and those looking for a career as a professional plumber. You'll have access to our state-of-the-art training facilities and be taught by fully-trained plumbers with many years' experience in the trade. To find out more, give us a call on 0800 345 7492.

View the amended Part P Document here: planningportal.gov.uk

As of last month the Government has wheeled out its latest changes to Part P of the Building Regulations in an attempt to cut down on the amount of “red tape”. In the eight years since its introduction Part P has been a vital measure in maintaining safety when it comes to electrical installations, making sure that professional electricians have the skill and competency needed to perform these tasks. In order to do certain installations, electricians (and DIYers) are required to gain their Part P certificate and join a Competent Person Scheme such as NICEIC, NAPIT or ELECSA.

The main change to the document is that it is now shorter and has greater clarity, with a notable reduction to the number of works that need to be notified to Local Authority Building Control. The full breakdown of changes is

  • Under the new regulations, any electrical work undertaken in kitchens or outdoors in no longer covered by Part P unless a new circuit is required. 
  • While before installers not registered with a Competent Person Scheme would have to notify their work so that a third-party inspector would need to check it, now these installers can instead use a registered third-party (e.g. another electrician) to sign off their work. This eliminates the cost of producing Building Regulations Compliance Certificates for some minor works, but importantly, the new regulations still retain the need to issue Electrical Installation Certificate Reports (EICRs) for all work carried out within a dwelling.
  • Reference is now made to BS 7671:2008 incorporating Amendment No. 1:2011.

The main positive that has come out of these changes is the potential new areas of work it opens up for Part P qualified electricians who can earn more from inspecting and signing off other people’s work. Organisations have also commended this new streamlined document for not compromising on safety.

However while the ESC (Electrical Safety Council) has praised the fact the Government is amending Part P, they have expressed concern over some of the changes. They believe that the areas that have seen a reduction in notifiable are reasonably high-risk according to data, and so “any electrical work must be of a particularly high standard”.

The third-party certification is also still in question, as the rules for the Approved Inspector Scheme are currently unclear. The document itself is likely to go under review again in 2015.

Get in touch to learn more about our training courses!

First Name *
Surname *
Telephone Number *
E-mail address *
Ask A Question *
 
Security Character Security Character Security Character Security Character Security Character Security Character
Enter Letters (No Spaces) *