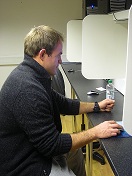
Following our plumbing glossary yesterday, Access Training have also put together a brief post covering common electrical terms that will be handy for all the aspiring electricians out there - whether they're DIY enthusiasts or aiming for a professional career.

Bonding: The process by which all metal parts in a circuit are electrically connected together and then linked to a real earth. This is done to prevent any metal component within a building becoming dangerous should it become live due to an electrical fault or damage. Any fault should cause the circuit protection device to operate and isolate the incoming mains.

BS 7671: Currently in its 17th Edition, this is the UK national safety standard for electrical installation work.

Consumer Unit: These are used to control and distribute electricity around the home. They usually contain a mains switch, fuses/circuit breakers and one or more residual current devices.

Earthing: In the event that there is a fault in the circuit, this will minimise the risk of an electric shock. It provides a path for the faulty current to flow safely to earth, causing the protective device (such as a fuse) to disconnect the circuit and stop the danger. An electrician should check that the earthing and bonding is satisfactory before starting any work.

Electrical Installation Condition Report (EICR): A report on the condition of your electrical wiring, containing an overall assessment of the safety of the wiring, observations on its condition, and a number of recommendations (in order of priority) for action (if any is required) to restore the wiring to a satisfactory condition for continued safe use. These were formerly known as Periodic Inspection Reports (PIRs).

Flush-fitted: These are electrical switched or sockets that have been installed so that their back boxes are contained within the wall or ceiling, making only the front plates visible. This often looks nicer than surface mounted connections but usually requires chasing to complete.

Miniature Circuit Breaker (MCB): These are automatic protective devices fitted into fuse boxes. They will disconnect a circuit should there be a fault or overload.

Part P: The specific section of the Building Regulations for England and Wales, which relates to electrical installations in domestic properties.

Surface-mounted: This is when switches and sockets are installed on top of a surface rather than behind it. While it is less seamless than flush-fitted installations, it causes less disruption to any decoration that surface may have.

Two Way Switch:  Switches which can be used in pairs so that either can turn a light on or off. Each switch has terminals allowing them to be linked using Three Core and Earth cable.

Of course once again this is only a very brief look at some of the things electricians come across on a daily basis, and is no substitute for proper comprehensive electrical training. If you would like to find out more about what it takes to become an electrician, earn valuable skills and the qualifications to go professional - Access Training have exactly what you need. With courses suitable for both trainees and homeowners looking to do a spot of DIY on their property, now has never been a better time to gain a better understanding of the electrical trade. Please visit the courses section of our website or alternatively get in touch with our team on 0800 345 7492.

It’s happened to us all at some time or other, the job we have been putting off because it’s a little bit too big or we’re not sure how to do it. We bite the bullet and decide to get a tradesman in to do the work for us. Which tradesman? Where do we go to find out if the voice at the end of the phone is in fact a ‘quality’ tradesman and not John Wayne with a screwdriver?

You could go to www.trustmark.org.uk

TrustMark is a government endorsed scheme that regularly checks that the registered tradesmen are providing their customers with the quality service and workmanship members of the public expect and deserve (quite rightly). Trustmark registered firms have to;

  1. A firm's technical skills have been independently checked through regular on-site inspections, as well as checks on their trading record and financial status;
  2. Firms have signed up to a code of practice that includes insurance, good health and safety practices and customer care;
  3. The approved scheme operator has checked and will continue to monitor the firm's quality of work, trading practices and customer satisfaction;
  4. Firms are able to offer an Insurance Backed Warranty;
  5. Deposit Protection Insurance is available for consumers in the event a firm should cease trading;
  6. Firms will be able to tell you about any building regulations you must comply with and may also be able to provide appropriate certificates;
  7. If you have a problem or disagreement with the firm, there will be a clear and user-friendly complaints procedure to help resolve the issue;
  8. The scheme is fully supported by Government, the building industry and consumer protection groups.
  9. All of these checks will give you - Peace of Mind.

When employing a tradesman TrustMark recommends you take the following advice;

  • Be specific and set out a detailed, clear brief when requesting at least three quotes.
  • Ask friends and family for a recommendation and check the TrustMark website to ensure that the tradesman is registered for the particular trades you require
  • Use a firm that advertises using a landline phone number and be very wary of those only willing to give you a mobile number
  • Seek references, speak to previous customers and if a reasonable sized job, visit previous jobs
  • Don't just go with the cheapest, consider your ability to communicate with the firm and the quality of their work
  • Only pay for work that has been done and not by advance payments
  • If materials need to be bought in advance by the tradesman, it is reasonable that the customer is asked to pay a fair percentage of these costs as the job progresses
  • Always use a written contract as it offers you protection if anything does go wrong
  • Agree in writing any changes to the agreed contract value and ensure these are agreed in writing before the work is done.

If you use a TrustMark tradesman your work should be carried out to a high quality and if things go wrong (God forbid) you, through the scheme, have a means of recourse. That has to give you Peace of mind.

- Mark Jenkins


Mark Jenkins is the Electrical Course Development Manager at Access Training. If you would like to learn more about electrical work and maintenance, you might want to consider one of the many electrical training courses we offer. These are available for both DIY enthusiasts AND people looking to gain the vital qualifications needed to make the career change to become an electrician. To find out more give us a call on 0800 345 7492.

common electrical problems

Some electrical problems are more common than others, and not everyone requires an intensive electrician course or professional qualification to deal with the issue at hand. With this in mind, here's a short list of five of the most common household electrical problems, and how they can be fixed with ease.

1. No power from an electrical socket

This common household electrical problem could be due to a number of things, some of which you will be able to fix yourself without the aid of a professional electrician. Usually, it's down to a tripped circuit breaker, or perhaps the fuse has gone.

Alternatively, it could be because of a loose wire somewhere. It's easy to check whether the circuit breaker has tripped or the fuse has blown, but if its neither of these you may need the aid of a power tester/voltage meter. If the test results in low or no power, it probably means the wiring is loose somewhere and requires further inspection.

2. Flickering lights

Again, this household electrical problem could be due to any number of reasons. Flickering lights or those that do not turn on/off when commanded are usually due to a larger problem, as is a buzzing sound you'll hear when the lights are on. The simple answer is that you might be using the wrong wattage light bulb, but it could also be a case of a bad connection. Whatever it is, in most cases this can be fixed by simply changing the bulb.

3. Half the house lights have gone off

We've probably all been here at some point. Usually, this household electrical problem can be fixed by locating your house's fuse box and flipping the switch (be sure all the light switches are off in the affected area though!). However once again it could be a short fuse or loose wiring somewhere. You might be able to locate this with your voltage tester/power meter but it's recommended that you call an electrician if needed.

4. Strange smell coming from switch/socket

When the circuit connection of an electrical device is damaged, the electricity jumps to complete the circuit. Not only creating this smell but also potentially resulting in a fire as the electricity zaps anything along the way. Electrical device arcing also indicates a serious damage to both the socket and electrical device. You'll need to unplug the appliance immediately and seek the help of a professional.

5. Hot switches

This usually occurs in dimming switches when they are running bulbs that are equal to or less than 600 Watts. When this happens, achieve the wattage required to run the dimmer properly by adding the right amount of bulbs. However, if it's the wall socket that's hot, you need to use a voltage meter to look for a high decrease or increase in voltage.

Hopefully, this post has helped you in being able to identify some of the common electrical problems you might find at home, and what you can do to fix them. However it is important to know your limitations, and NEVER attempt something that should be performed by a professional electrician.

If you would like to find out more, Access Training offer a DIY Electrical course in addition to our professional qualification courses, giving you the opportunity to practice your DIY electrical skills under the tutelage of industry professionals. For more information give us a call on 0800 345 7492.

View the amended Part P Document here: planningportal.gov.uk

As of last month the Government has wheeled out its latest changes to Part P of the Building Regulations in an attempt to cut down on the amount of “red tape”. In the eight years since its introduction Part P has been a vital measure in maintaining safety when it comes to electrical installations, making sure that professional electricians have the skill and competency needed to perform these tasks. In order to do certain installations, electricians (and DIYers) are required to gain their Part P certificate and join a Competent Person Scheme such as NICEIC, NAPIT or ELECSA.

The main change to the document is that it is now shorter and has greater clarity, with a notable reduction to the number of works that need to be notified to Local Authority Building Control. The full breakdown of changes is

  • Under the new regulations, any electrical work undertaken in kitchens or outdoors in no longer covered by Part P unless a new circuit is required. 
  • While before installers not registered with a Competent Person Scheme would have to notify their work so that a third-party inspector would need to check it, now these installers can instead use a registered third-party (e.g. another electrician) to sign off their work. This eliminates the cost of producing Building Regulations Compliance Certificates for some minor works, but importantly, the new regulations still retain the need to issue Electrical Installation Certificate Reports (EICRs) for all work carried out within a dwelling.
  • Reference is now made to BS 7671:2008 incorporating Amendment No. 1:2011.

The main positive that has come out of these changes is the potential new areas of work it opens up for Part P qualified electricians who can earn more from inspecting and signing off other people’s work. Organisations have also commended this new streamlined document for not compromising on safety.

However while the ESC (Electrical Safety Council) has praised the fact the Government is amending Part P, they have expressed concern over some of the changes. They believe that the areas that have seen a reduction in notifiable are reasonably high-risk according to data, and so “any electrical work must be of a particularly high standard”.

The third-party certification is also still in question, as the rules for the Approved Inspector Scheme are currently unclear. The document itself is likely to go under review again in 2015.

Not all electrical work requires a trained professional. Minor tasks such as replacing a light switch can be performed without having to notify your Local Authority Building Control Department, however they still must be done to current Building and Electrical regulation standard.

While there are a wide variety of different types of light switch you might find in the home (including pull-cord switches, narrow architrave switches and rotary dimmers), here is a guide to the most basic of them – the one-way and two-way switch. The difference between them is that two-way switches are used where there is more than one switch connected to the same light (e.g. at the top and bottom of the stairs).


Safety first

Before you start ANY sort of electrical work make sure the power is switched off at the main consumer unit OR switch off the relevant circuit breaker and lock it if you can. Then make sure that the circuit is indeed dead using a voltage tester/meter. Also take note that since 2006 the core colours inside electrical cables have changed. In the new two-core-and-earth cable, the live or phase core is insulated in a brown sheath rather than red. The neutral core is now blue as opposed to black.


What you will need:

  • Voltage tester/meter
  • Side cutters Screwdrivers
  • Green/yellow earth sleeving
  • Suitable replacement plateswitch (1 or 2-way)
  • Screws
  • Brown PVC electrical tape or sleeving
 

For one-way switches:

Step 1: Isolate the circuit and then confirm that the power is off using your voltage tester. Unscrew the switch faceplate and pull it forward, revealing the connections behind. These terminals will usually be marked something like L1, L2 and COM.

Step 2: Draw a diagram so that you remember which colour and number of wires were attached to each terminal. Then release the terminal screws and pull the cores from them. If the earth core is properly insulated in green/yellow sleeving and connected to the mounting box, leave this attached.

Step 3: Connect these cores to the correct terminals of the new switch, using your diagram as a reference. Tighten the screws and check they are clamping the cable cores firmly by gently tugging the wires.

Step 4: If there isn’t one already, fit a length of brown sleeving over the blue core to indicate that it is a switched live.

Step 5: If it’s not already fitted, put some green/yellow sleeving over the bare earth core of the incoming cable and connect it to the earthing terminal of the mounting box. If you’re using a metal switch, be sure to earth the switch faceplate as well.

Step 6: Double check that each connection is secure, then push the cable back into the mounting box and fit the faceplate.


For two-way switches:

While this is similar to a one-way switch there will normally be three cores to the cables – coloured brown (formally red), black (yellow) and grey (blue). Again these terminals will be labelled something like L1-3 and COM.

Step 1: Isolate the circuit and make sure the power is off with your voltage tester.

Step 2: Remove the faceplate from the existing switch and disconnect the cable cores.

Step 3: Note which colour goes to which terminal (write it down if you think you’ll forget!) and then transfer them to the corresponding terminals on the new switch.


While this is simply a brief guide to some of the electrical work you can do yourself around the home, more technical electrical work will require you to have a Part P qualification if you wish to carry it out yourself. If you are interested in learning about more work you can do or achieving Part P qualification then the best way is to learn from one of Access Training’s comprehensive electrical training courses. Offering professional qualifications to both aspiring and existing electricians as well as DIY courses, there truly is something for everyone regardless of age, gender, background or experience.

Contact Access Training on 0800 345 7492 for more information or to arrange a visit of our training facilities.

Although Part P Building regulations require a qualification to undertake extensive electrical work in your own home, minor tasks such as replacing damaged sockets or light switches can be done without having to notify your Local Building Authority Control Department. In this post we'll take you through a few simple steps to replace a plug socket or alternatively change a single one into a double.


Safety first

Before you start ANY sort of electrical work make sure the power is switched off at the main consumer unit or switch of the relevant circuit breaker and lock it if you can. Then make sure that the circuit is indeed dead using a socket tester. Make sure to also have protective gloves and safety goggles on you at all times.

Also take note that since 2006 the core colours inside electrical cables have changed. In new two-core-and-earth cables, the live/phase core is insulated in a brown sheath as opposed to a red one and the neutral core is now blue rather than black. If you are connecting old and new cables together, take extra care to make sure that the cores are attached by their corresponding colours.


What you will need:

  • Socket tester & socket template
  • Screwdriver
  • Pipe and cable detector
  • Drill
  • Socket faceplate or new double socket
  • Wall plugs and screws
  • Mounting box
  • Green/Yellow pvc sleeving


To change a damaged socket:

Step 1: Confirm you have switched off the main power using your socket tester. Once sure unscrew the socket faceplate and pull it away from the wall. Keep the screws just in case the new ones don't fit.

Step 2: Loosen the terminal screws and release the cable cores. Should the insulation be heat damaged, cut back the cores and strip the ends. If the earth core is bare, cover it with the green/yellow sleeving.

Step 3: Connect the brown (or red) core(s) to the live terminal of the faceplate, the blue (black) ones to the neutral terminal and the earth core to the earth terminal. Tighten the screws fully and fit the new faceplate. When you have turned the power back on, use the socket tester again to check it is wired correctly
 

To change a single flush socket to a double:

Increasing the number of sockets in a room isn't as difficult as it might sound if you follow these simple steps...
 
Step 1: Isolate the circuit and then use the socket tester to make sure that it is dead. Unscrew the faceplate and disconnect the cables from the single socket mounting box.

Step 2: Knock out the middle section in the double box and pass the cables through. Mark where the screw holes are on the wall using a pencil, remove the box and drill.

Step 3: Screw the new box in place and connect the cables to the terminals. Fit the new faceplate and then test using the socket tester again once power has been restored.
 
Hopefully after reading this you'll feel confident enough to do these tasks yourself without having to pay for a professional electrician! However if you're interested in learning more about what electrical tasks you can perform at home with the right training, or alternatively hoping to gain qualifications to become an electrician - look no further than Access Training's range of bespoke electrical courses. From Part P to PAT Testing and wiring regulations to DIY, we offer something for everyone regardless of age, background or experience.
 
Contact Access Training on 0800 345 7492 for more information or arrange a visit of our training facilities.

Part P Changes

In 2013, the Government made important changes to Part P of the Building Regulations. These are the regulations that ensure that all fixed electrical installations in domestic dwellings are suitably designed, installed, inspected and tested to provide reasonable protection against becoming a source or fire or a cause of injury to persons.

These changes to the Part P of the Building Regulations consisted of two principel modifications, the first of which reduces the range of electrical installation work that needs to be notified. Previously, electrical work undertaken in kitchens (such as adding a new socket) or gardens (installing security lights) were among the work you'd need to be Part P qualified to perform without having to notify an inspector. However now these tasks will no longer be notifiable unless a new circuit is required.

There are three main areas where electrical work will still be notifiable due to Part P of the Building Regulations, and these are:

  • Any work involving the installation of a new circuit
  • The replacement of any consumer unit
  • Any addition or alteration to existing circuits in a special location
In this instance, "special location" can mean two things, the first of which is any room containing a swimming pool or sauna heater. Secondly, it is any room containing a bath or shower, where the space surrounding a bath tap or shower head extends vertically from the finished floor level to a height of 2.25m, or 2.25m from where the shower head is attached. This can also apply horizontally, where the bathtub or shower tray has a distance of 0.6m. Alternatively, where there is no bath tub or shower tray from the centre point of the shower head where it is attached to the wall or ceiling to a distance of 1.2m.
 
The second part of these changes to the Part P of the building regulations relates to the use of a registered third party to certify notifiable work. Previously, any electrician undertaking work that fell under Part P not registered with a competent persons' scheme was required to notify their local authority's building control. They would then send out an independent inspector who would determine if the work was acceptable.
 
However, these changes mean that electricians not registered with a competent persons' scheme have to get their work signed off by a registered third party. For more information, visit the official Government Part P document.
 
Are you looking to become Part P qualified? Not only will this enable you to register with a competent persons' scheme and allow you to self-certify your own work (saving you hundreds of pounds), but could also potentially provide you with a whole new area of work when the third party approval system is finalised. Here at Access Training we offer a wide range of electricial courses, including specific Part P Training. If you would like to find out more, give us a call on 0800 345 7492.

This is a question posed by many a householder, however of the reality is that it might not need to be changed. If the fuse board is damaged and there's a chance that people could touch "live" parts (risking an electric shock), then it does need to be changed.

The old fuse board will not meet the requirements of the BS7671 Wiring Regulations 17th Edition Ammendment 1 (2011). The fact that the installation does not meet the requirements doesn't mean it is illegal or indeed unsafe, however the new requirements are intended to make the installation "more" safe by reducing the chances of getting an electric shock.

In order for your domestic installation to meet the requirements of the "Regs" it must also meet the new RCD (Residual Current Device) requirements. RCDs cannot be fitted in older style fuse boards so if your installation needs to be brought up to date and made safer a new consumer unit will be needed.

There are numerous areas where RCDs are required, which should be rated at 30mA. These include;

  • Any cable buried in a wall or partition at a depth of less than 50mm from the surface requires protecting by an RCD unless it is protected by earthed metalwork such as conduit or trunking.
  • Any cable passing through a wall or partition that contains metal parts other than screws or nails.
  • Any cable that is installed outside the 'cable safe zones' needs protecting with both earthed metalwork and an RCD.
  • Every socket outlet rated 20A or less that is used by "ordinary persons" (i.e. home owners) intended for general use, require RCD protection.
  • Mobile equipment used outdoors rated up to 32A.
  • All circuits supplying power to a room that contains a bath or shower are required to be RCD protected.
If you ask an electrician to install a new socket and you do not have RCD protection, then this new work will need to meet the requirements. This could mean that your fuse board will need to be replaced so that the RCDs can be installed! This simple and relatively cheap job has now become much more expensive, but the end result is that your electrical installation is much safer.
 
Should you be planning to do this (or any other electrical task) yourself, have you considered taking one of Access Training's bespoke electrician courses? Whether you're looking to gain new DIY skills to help you around the home or professional qualifications in order to become an electrician, we can help you.
 
For more information contact us at 0800 345 7492.
 
- Mark Jenkins

Get in touch to learn more about our training courses!

First Name *
Surname *
Telephone Number *
E-mail address *
Ask A Question *
 
Security Character Security Character Security Character Security Character Security Character Security Character
Enter Letters (No Spaces) *